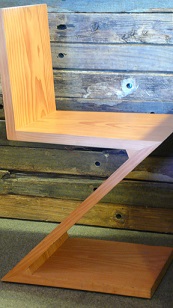
example of a Zig-Zag chair
Some friends (well, one friend) expressed some interest in the chair project I crowed about on facebook recently. So I decided to document the project here. The idea of making a Rietveld Zig-Zag chair was my father’s: he conceived a desire for one, and bought some books and plans. I think he was attracted by the idea that he could make it himself, but eventually abandoned that plan, and sent it to me. In fact the design is deceptively simple: it was described by Dutch designer Gerrit Rietveld in 1934 as a “plane zigzagging through space.” My father wanted a single chair. I looked at the plans and photos, and I realized this would be more than an afternoon’s work. An interesting project, but I had lot of interesting projects at the time, so I put it away.
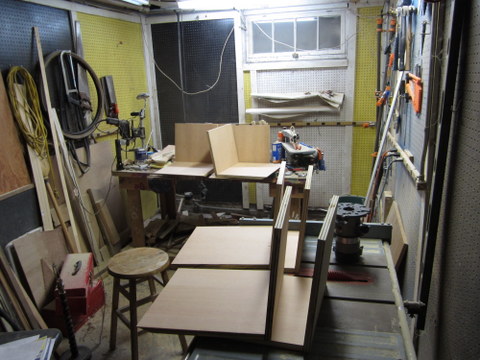
When I finally came back to the project a few weeks ago, and looked more seriously at the design, I realized that making just a single chair of this type would involve a great deal of wasted effort. The chair’s construction involves several tricky features that belie its simple appearance. Setting up the cutting jigs for these angled cuts and joinery takes time, exacting measurement and careful planning, but the cutting itself is mere rote work: satisfying, easy work on a modern machine.
Furthermore, it was clear from looking at them that Rietveld’s designs were always intended to be mass-produced, and a little reading lends some credibility to this as an accepted historical idea. It is tempting to read the De Stijl movement’s obsession with right angles and rectangles as an embrace of industrial methods. Of course it’s difficult to know: there was a natural reaction against the earlier prevailing Impressionist style, and it may simply be that Rietveld saw an opportunity to capitalize on the style’s suitability for factory manufacturing techniques.
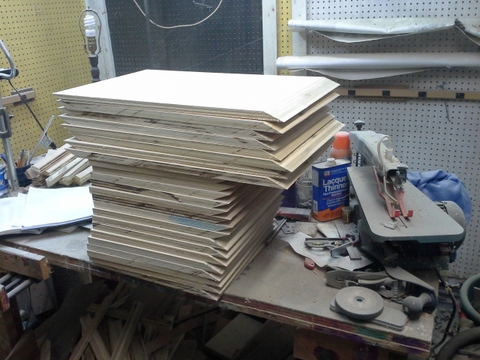
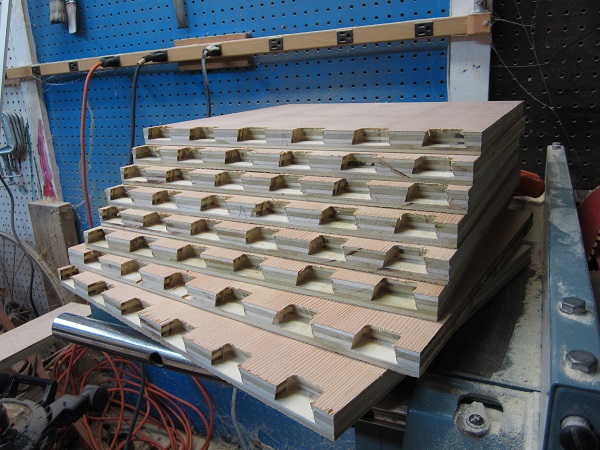
At any rate, I determined to make a set of eight. In this way I could achieve economy of scale by reusing the various table saw and other cutting jig setups I would need to make.
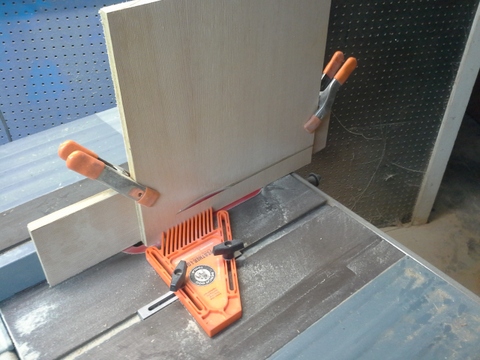
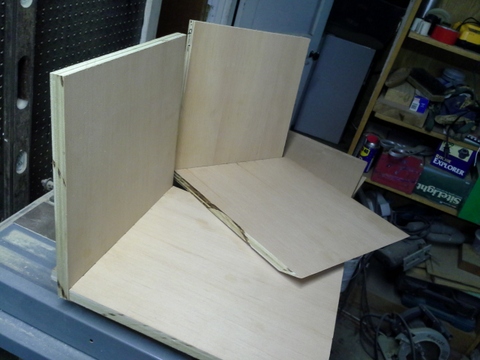
Chief among the difficulties with this chair are the two acutely-angled joints connecting the diagonal member, the “leg” if you will, with the seat and with the base. Usually in finer woodworking one joins pieces without nails, bolts or other hardware, ideally holding them together without even glue. But there really is no classical all-wood joint for the zigzag chair’s acute angles, at least not anything that would support a person’s weight. Classic zigzag chairs use bolts to hold together the two acutely-angled joints. Bolts! I never dreamed of holding together furniture with bolts. I consider using bolts and hiding them, but I don’t particularly like the idea of this kind of subterfuge. At any rate it would be impossible to truly hide the necessary plugs since their grain wouldn’t match. Still we might come up with some other solution.
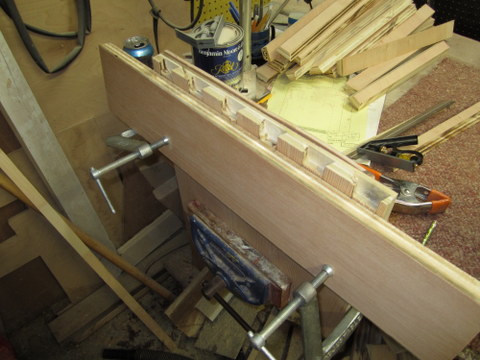
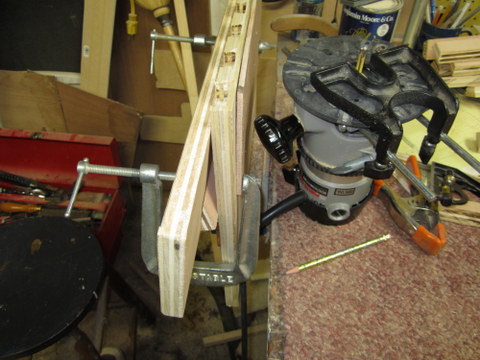
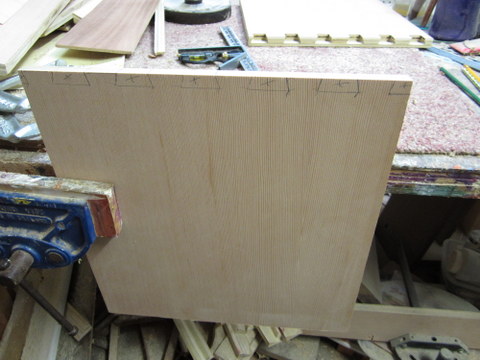
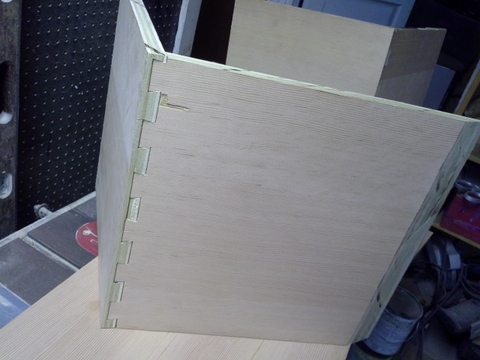
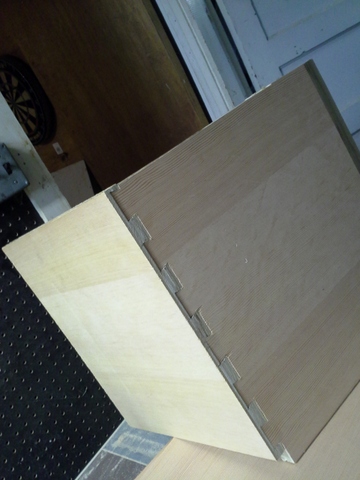
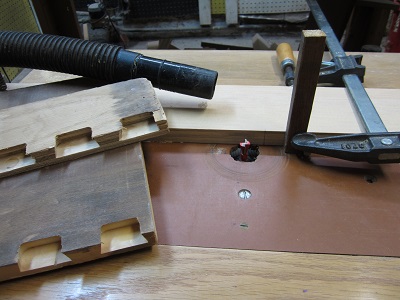
The other challenging piece of joinery comes between the seat and back. Dovetail joints are called for here: these are the strongest joint for a right angle between boards. Cutting dovetails requires a certain finesse and careful craft with hand tools, or specialized cutting elements for machine tools. I resolved to acquire a dovetail bit for my router that would make it easier to cut the 40-odd tails in these eight chairs. But the back is not at a right angle to the seat. It reclines by 8°, accommodating the human form in a necessary compromise with the purity of the De Stijl movement’s Cubist-informed aesthetic. The resulting joints will have to be cut at an angle 8° from square, forming a mind-bending three dimensional puzzle that I struggle to visualize even with the aid of drawings.
Finally, I complicated the picture a bit further by the use of plywood. Plywood is not often used in fine furniture, but I felt that it was an attractive choice for this project for several reasons. For one, fine plywoods are available (not at all like the construction-grade kind you see at home improvement megastores), and these offer a surface with a large swath of continuous grain. To achieve a similar effect with solid wood would require very wide boards that are not easy to find. Also, I wanted a fine-grained appearance that would require quarter-sawn lumber, a wasteful luxurious product that is almost vanished in this time of scarcer forest resources. I simply felt the idea of using an economical material like plywood would fit better with the industrial aesthetic of the chair design. And finally manufactured boards (plywood) are greener: they make the most efficient use of trees since they are able to use junkier wood on the inside, and save the good pieces for the surface.
The problem with plywood is that its end grain is really unattractive, and tends to get uglier still as it loses little chips during the construction process. The usual technique for dealing with this is to cover the ends with thin strips of solid wood, or veneer, but there was one place on the chair where this technique would not work: the back/seat joint. So I’ve resolved to further complicate the construction of that joint by making it half-blind: the ends of the seat tails will be buried in the interior of the joint, allowing the exterior surface of the back to descend uninterrupted to the outside of the angle with the seat. We’ll see how I manage that as the work unfolds!
Next time: half-blind compound dovetail