Steam-bending is a voodoo woodworking art. If you heat up wood, and it has enough moisture in it, the fibers will loosen enough that a previously stiff board can be bent into a new shape, which it will retain after cooling. At least some wood will. How well this works depends on a lot of factors including the species of wood, whether it is clean (without knots), whether the grain runs nicely parallel, how dry it is, whether it has been air-dried, or kiln-dried, how long you steam it, whether you pre-soak it, in water, or in water plus fabric softener! Some youtubers will tell you how easy it is, but even they keep extra pieces on hand for when they break one. Many years ago I had tried bending guitar sides over a hot pipe (no steam required), and that went OK, so how hard could it be?
I went to a specialty lumber store and bought some ash (kiln dried, as everything is that you buy at a lumber yard). I had read that ash was a good species for bending, even kiln dried. The gold standard for this kind of work is white oak, but supposedly only when it is green, or lightly air dried, and I just didn’t have access to anything like that. Following the book, I concocted a steam box from a sheet of styrofoam insulation and a lot of duct tape, and hooked it up to our old hot pot using some PVC pipe left over from a bathroom renovation.
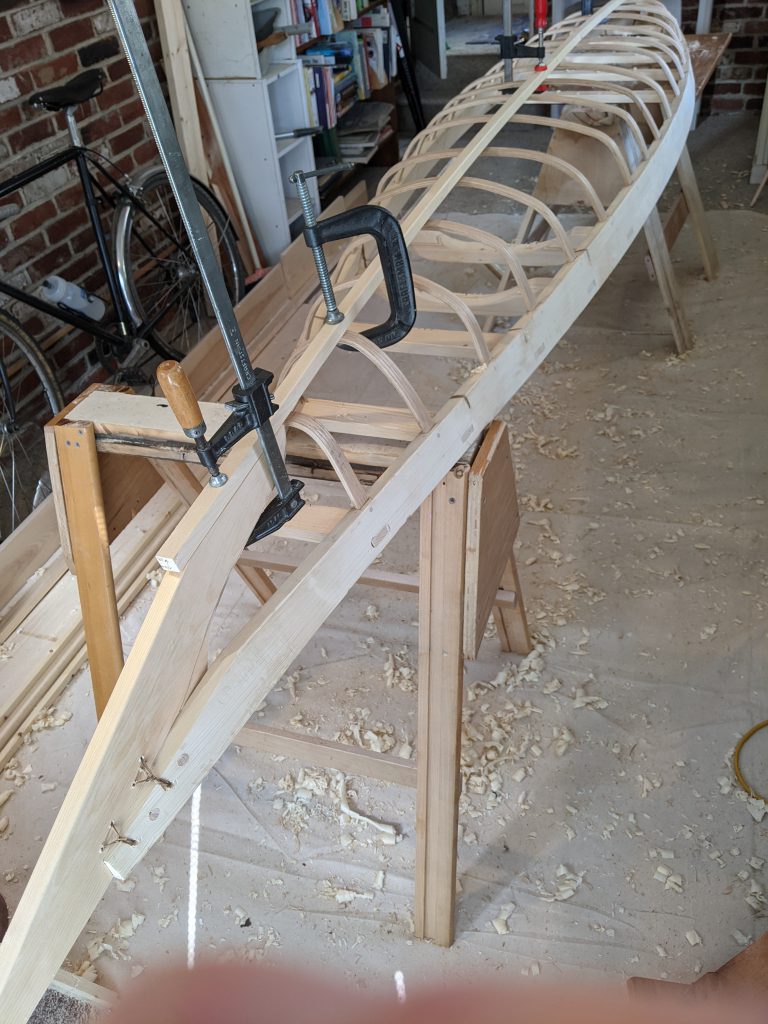
I did some trial bending runs to get an idea how long I would need to cook the ribs and settled on something like 15 minutes. The idea here is to work efficiently by staging all the ribs, loading the steamer with a batch of 4 or 5 inserted at one minute intervals, and then inserting a new dry one at the left every time you take a cooked one out of the right.
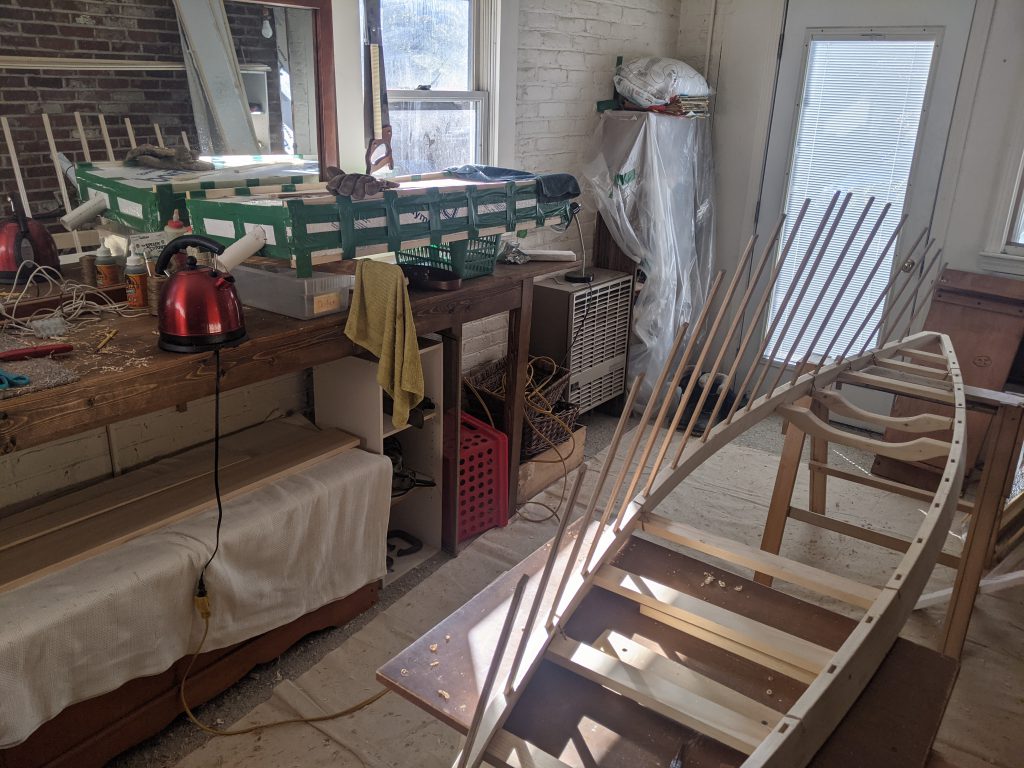 I won’t go into the whole bending process itself – there are some great videos from pros out there you can watch if you care to. I’ll just say that it was nerve-wracking and fun, and it came out OK in the end, and even if some of the ribs did split out the grain here and there, nothing too terrible happened. One thing I might do different if I try this again though, is to pre-soak the wood. I decided not to this time, following the advice of one knowledgeable-sounding site I found. That guy had nothing but scorn for the idea. Now I’m not so sure – it might have helped. I had to apply a *lot* of pressure to bend these ribs, and I get the idea it should have been easier. You can see one of the several failed attempts at the bottom of the photo. The room smelled like hot styrofoam the whole time.
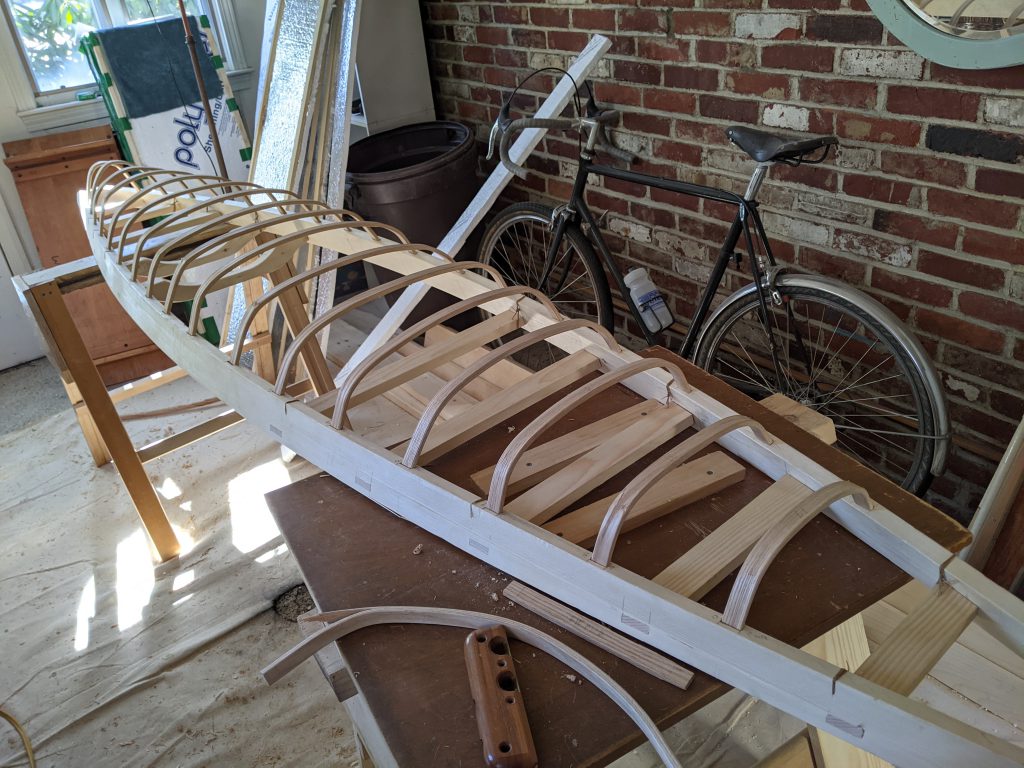
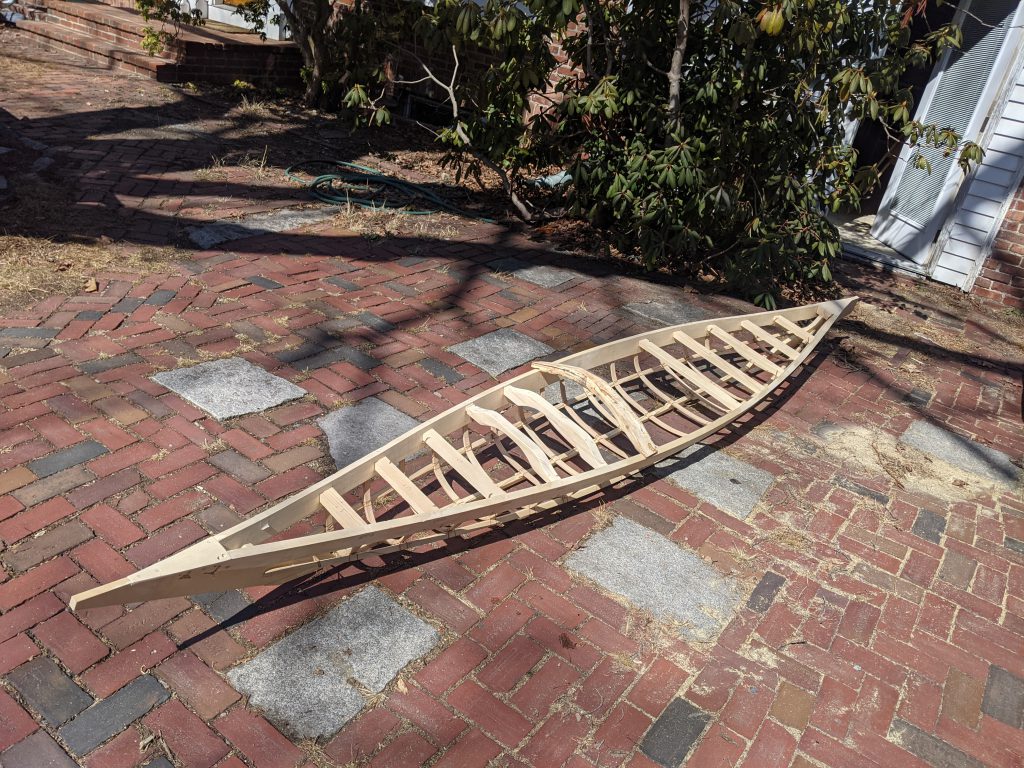
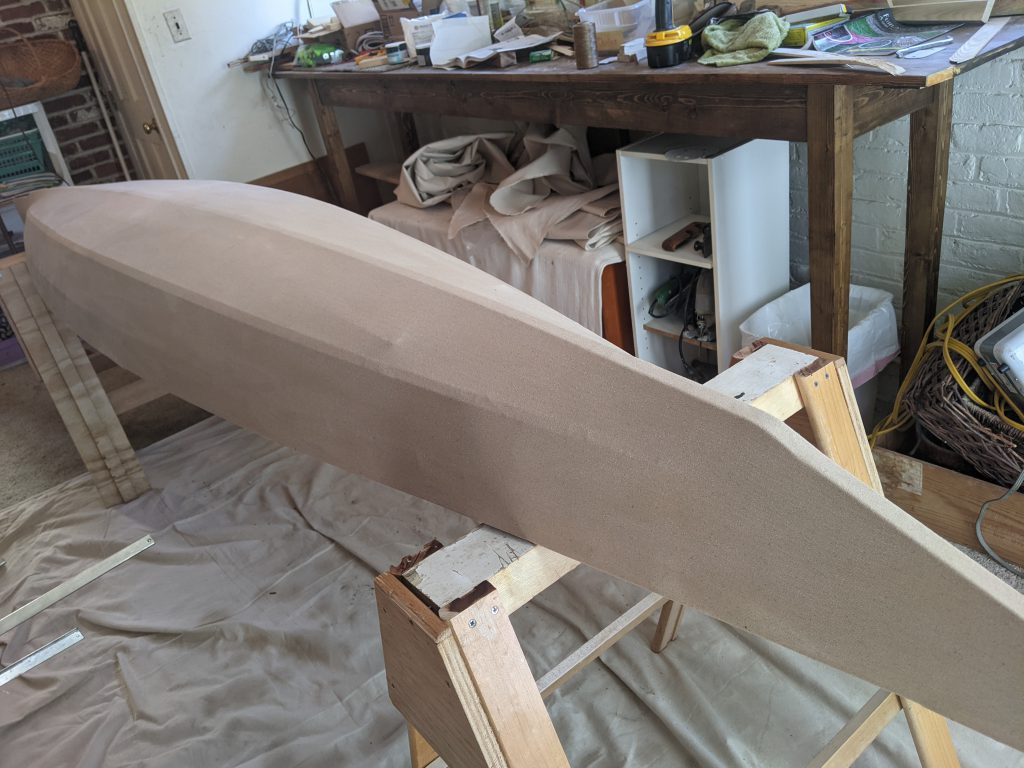
The ribs outline the shape of the hull. Now we have really defined how the kayak is going to eventually sit in the water. Its hydrodynamic characteristics will all derive from this shape.
The next step is to fit out several longitudinal pieces: the keelson, which runs the length of the boat at its lowest point, and the chines, which run in parallel on either side. These all come together at the bow and stern where they meet two other pieces that form the pointy ends. The book had a fancy name for them, but for the life of me I can’t remember what it was. In this photo you can see the nifty lashing that holds these pieces to the ribs; the keelson is done, here, and the chines are being held in place with clamps while they are positioned for optimum boat shape (they will hold the skin just off the ribs).
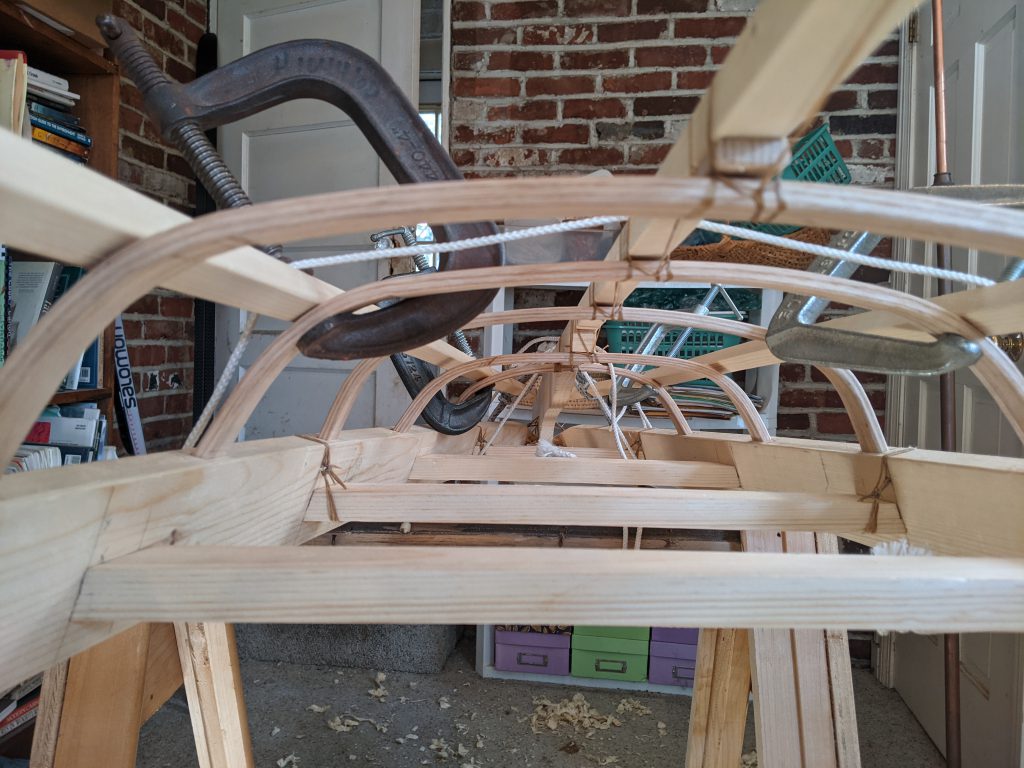
Here’s the pointy end I was talking about.
Now it really looks like a boat! Just needs a few little odds and ends, and then a skin!
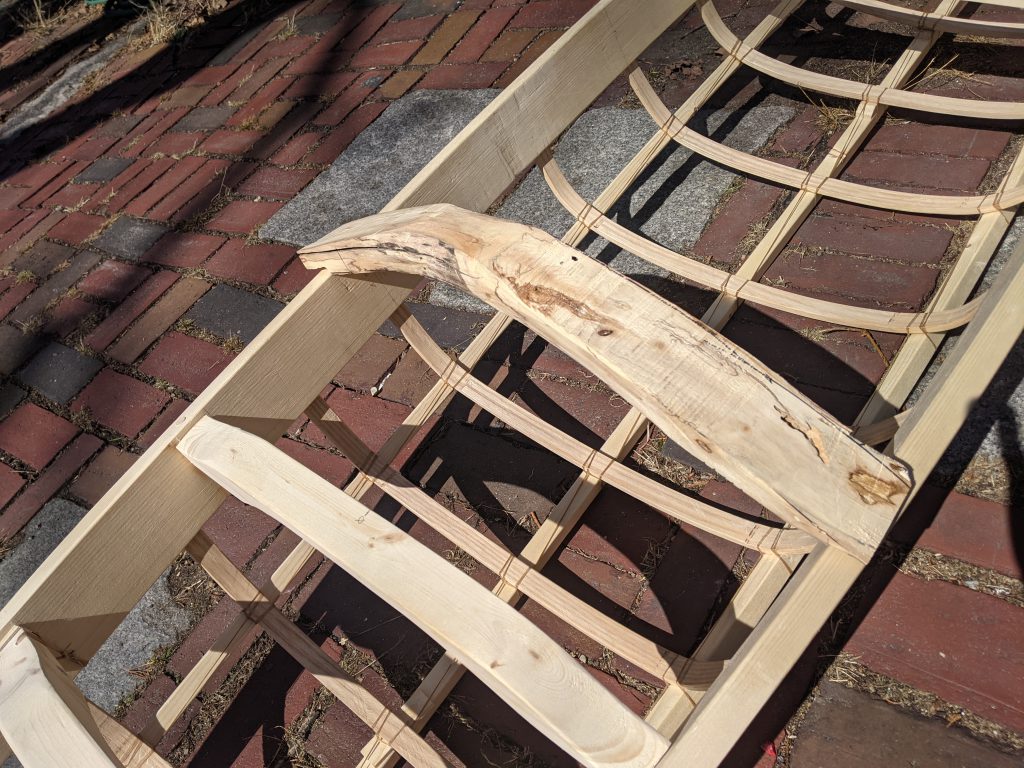
Oh I forgot to mention this cool part of the Greenland kayak design, the Masik. This is a curved piece of wood you brace your thighs against when paddling. I made this one out of a curved maple branch that fell off the tree in front of my house. You can see that tree’s shadow on the bricks there. It’s a giant, starting to die, but it still explodes in a riot of red, orange, and yellow every fall and buries us in its leaves. The piece I made the Masik from was starting to rot a bit, and it has some neat figure in the grain that I liked a lot. Shaping it was a fun challenge. I roughed it out with a chain saw and then went at it with a variety of hand tools. In this picture it’s still in a pretty rough state, but you’ll have to take my word, it worked out nicely.
 Oh no! Somewhere along the way this gunwhale developed a nasty-looking crack. More fallout from forcing them into too dramatic a shape? Oh well, it doesn’t go too deep – I hope it’ll be OK? Better get the skin on soon, that should help to hold it together, right.
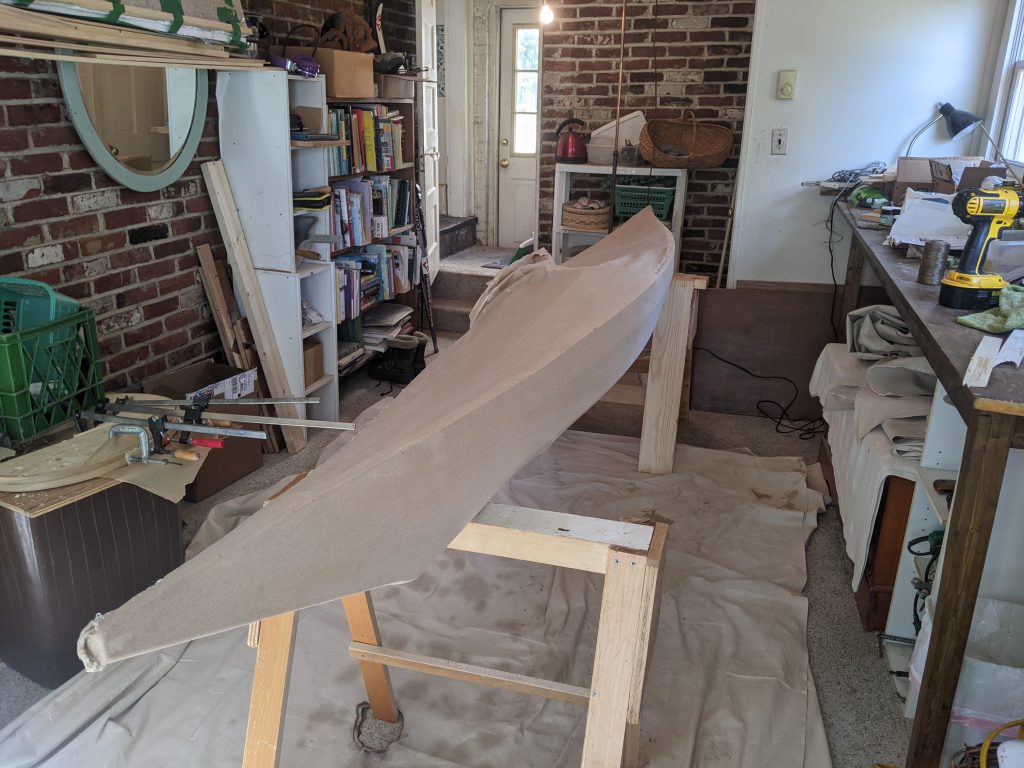
I decided to skin the boat in canvas, and coat it with butyrate dope like an old airplane, in keeping with the generally old-fashioned gestalt. Sealskins seem to be out of fashion, and anyway, unattainable. Most people seem to use nylon at this point. It’s lighter and probably easier to coat since you can use something easier and cheaper like epoxy or urethane or some such thing. Cutting it is annoying though: you need a hot knife to melt the edges to prevent it from fraying. Canvas was fun to work with. I learned how to sew. A thimble was essential to get the big needle through several layers of the stuff. The thread is dental floss!
The whole process of stretching the canvas on, trying to keep as much tension as possible, was pretty fascinating. The traditional system is to lace up a very rough seam, like a giant shoelace, along the centerline of the deck, draw it tight, and then sew up with fine stitches. The book I was following had a different idea, which I tried, stapling the fabric to the gunwhales to tighten it, and then stitching along one side of the deck.
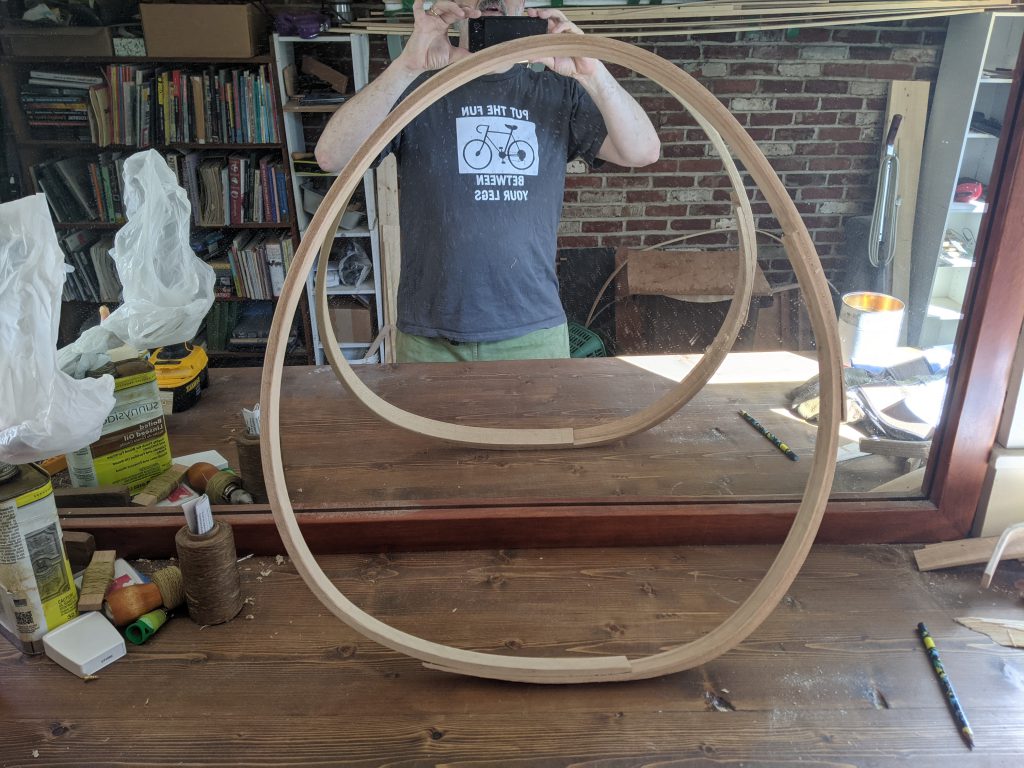
Oh I almost forgot to mention. There was this thing that drove me totally crazy right at the end of the project. Another steam bending step was required in order to create the hoop that forms the cockpit, drawing all the fabric together around the place you sit. The idea was to make this hoop by bending a single six-foot stick of ash around a form. I tried this three times and broke the darned thing every time. Maybe I didn’t steam it enough at first? This piece was bigger and thicker than any of the ribs. One time I think there was a weak spot in the grain. The bending itself is tricky – you are holding this thing under a lot of pressure, working under time pressure since the wood is only pliable for a short time after you take it out of the box. Finally, even the fourth time it broke, so I finally decided to make it out of two pieces, and glue them. Sigh, the only glue on the thing. But it got done
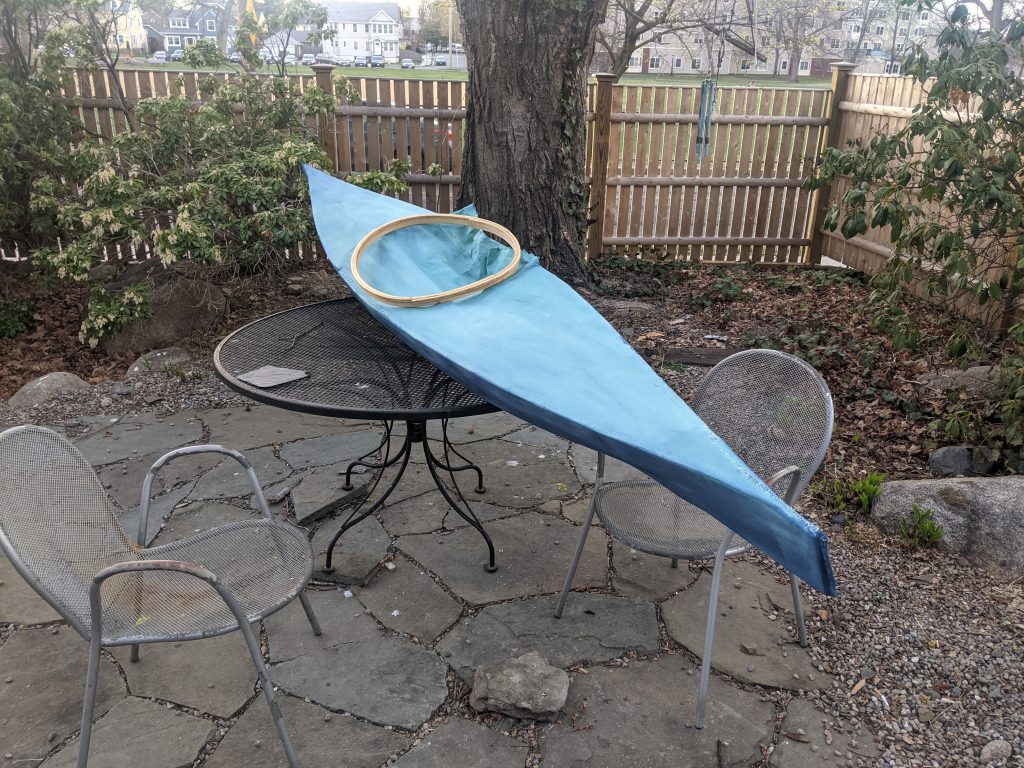
Once the stitching was done, and I had made the cockpit hoop, I died the fabric. You can see my first crude stitches on the stern before I figured out how to get the seam right on the corner.
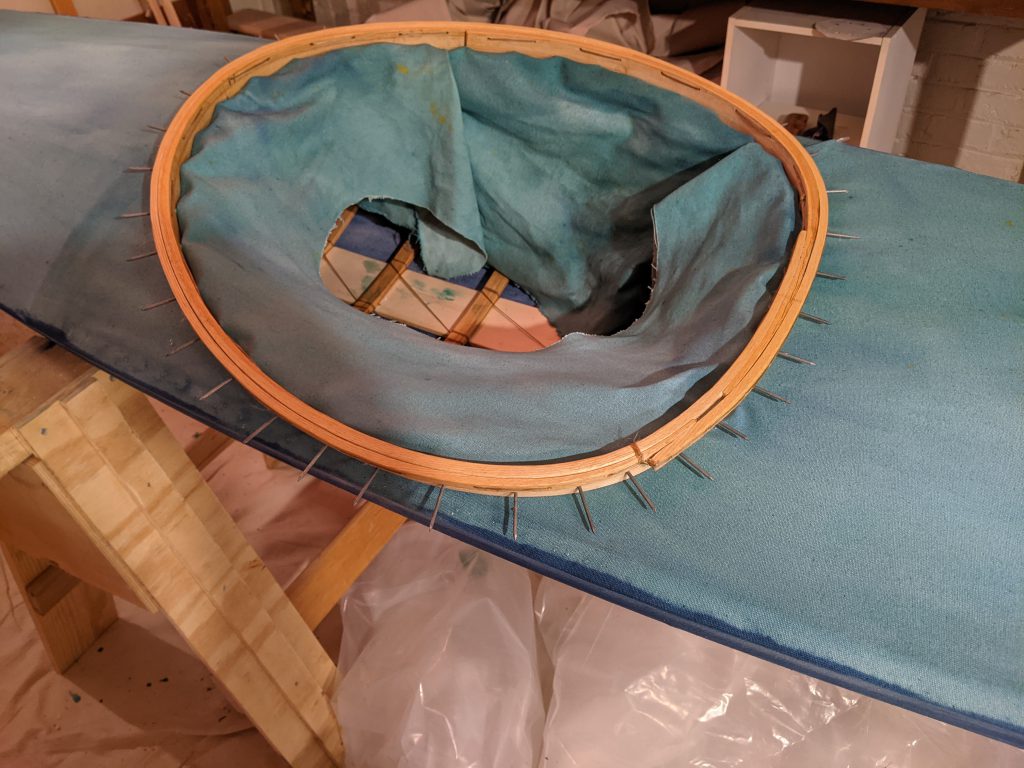
Getting the skin stitched into the cockpit hoop was an exercise in trying to tension up the loose flaps in the middle of the deck. Following the system proposed in my book was pretty straightforward and a little magical; I drilled holes all around the hoop and stuck nails through the fabric just below the holes, levering them up and pushing them through in order to tension everything. Then I laced a length of cord through all the holes, removing the nails, and the twine draws everything up nice and tight. Here’s a picture of the hoop with the nails holding the fabric to it:
The last thing is to coat the whole job in cancer-causing chemicals to make it watertight. As I said before I’m using butyrate dope. This is the stuff you may have sniffed if you ever made a model airplane. It is a toxic stew of VOCs (volatile organic compounds) – basically every chemical ending in “-ene” is in there. I bought a respirator, don’t worry, my glue-sniffing days are over.
Next post should be launch day. I’m super excited to see if this thing actually floats, how tippy it will be and whether it will track straight. Oh and hmm I guess I’ll need to name it (her?). That will be the hardest part.